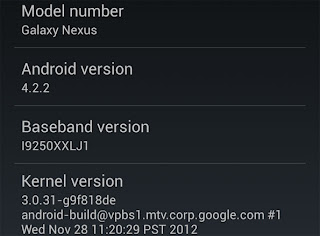
The reviews of the new update of the system are positive and for the rooted users or others, updating the system to Android 4.2.2 over the air (OTA) will get some troubles because of the custom recovery. But don’t worry, you can try the following three ways to get the new update besides installing the OTA.
Note: The method below is under the assumption that you’re running stock Android and not a custom ROM. For custom ROM users, an updated Android 4.2.2 version of that ROM have to be found on the device or download suitable stock image from Google and install factory image fresh which will erase everything.
Method 1:System Updates
- Go to Settings> Apps > All and scrolling and find Google Services Framework.
- Tap the “Clear Data” button and confirm by tapping “OK”, then back to the main Settings screen.
- Tap “About Phone” on Nexus 4 or About Tablet on the Nexus 7 and Nexus 10, and then tap “System Updates”, tap “Check Now” and the update process of Android 4.2.2 should begin when you are asked to confirm the update.
- When finished the update, your root will remove without the extra protection. You can use the Clockwork Mod recovery or the OTA Rootkeeper to retain your root when get the update.
- Download the Android 4.2.2 update for Nexus 7 , Nexus 4 and the Nexus 10, and transfer the file to your device.
- Reboot the device into recovery (power down the device, and then power it up while pressing (and holding) the volume up and down buttons).
- Boot to a screen with a big (green) colored arrow pointing to where power button is, and Andy the Android in the background.
- Use the volume button to choose different boot options. Press volume up or down until the arrow is red and says “Recovery mode”, then press the power button.
- After booting to recovery, you will find the option to install from a zip, choose the file you saved to your device and start to install the Android 4.2.2 update.
At first, ensure the present system you have used is updated to Android 4.2.1 and not an earlier build.
- Install the ADB file and let it work.
- Download the Android 4.2.2 OTA update to Nexus 7 , Nexus 4 and the Nexus 10 and move the file to the same folder where ADB is located
- Connect the device with computer via USB cable.Boot the device into recovery like the previous method, and find the option to “sideload” or “apply update from adb” on the recovery mode menu.
- Open a command-line window on the computer and run the commands.
adb sideload de8b8d101614.signed-occam-JDQ39-from-JOP40D.de8b8d10.zip
Nexus 7:
adb sideload 6ece895ecb23.signed-nakasi-JDQ39-from-JOP40D.6ece895e.zip
Nexus 10:
adb sideload eaef14432ff5.signed-mantaray-JDQ39-from-JOP40D.eaef1443.zip
- When the running progress reaches 100%, you will see the device installing the update. After the update, reboot the device from the recovery menu, and the updates will run the final step and once it finished, you can enjoy Android 4.2.2.
You may also like:
Upgrade Your Galaxy Nexus or Nexus 7 to Android 4.2 Jelly Bean


No comments:
Post a Comment