I found this greate tutorial on the blog of Moyea Web Player, now I add it onto my own blog -
An award-winning content management system(CMS), an open source solution to build your own website and online application, a totally free and easy-to-use tool available for everybody—that is our topic today, Joomla!.
New users to Joomla! and have no ideas how to start? No problem, here are some useful tips and personal experience for your reference:
1. Grab some basic info:
Read and learn something very basic about Joomla! here before you really start the journey.
2. Try the online demo:
Just simply register with your email here and you are entitled to use the online demo immediately.
Try to use and edit all the functions, tools and components it has on administrative backend and don’t be afraid of making mistakes and messing the program up. Why? Because it’s just a demo and you can’t break it.
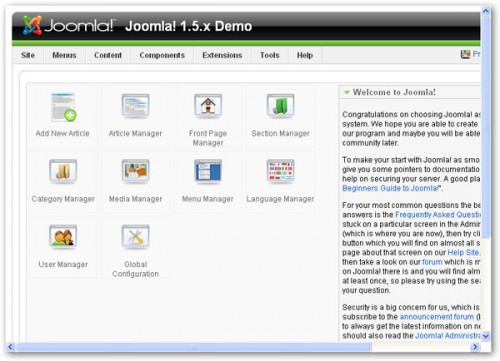
Have a look at the interface of administrative backend below and the options you can use to build your self-customized website.
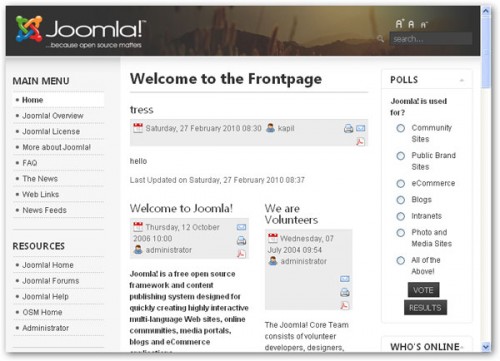
Immediate preview of public frontend is available everytime you click “Preview” button after all the changes are done.
Below is an example.
3. Extend the power of Joomla!:
We know from the previous step that Joomla! has provided abundant existing applications, content managers, components, extensions, etc for you to build and
the most important, to customize your own personalized websites. Still not enough and looking for more? Joomla! will surely give you everything you want!
Supplementarily, there are thousands of extensions available in the Joomla! Extensions Directory to help you implement some specialized functionalities or you can Create and Share your own extensions.
This is exactly the essence of Joomla!. A totally open source and it is willing to be extended and customized in any form and style you can imagine.
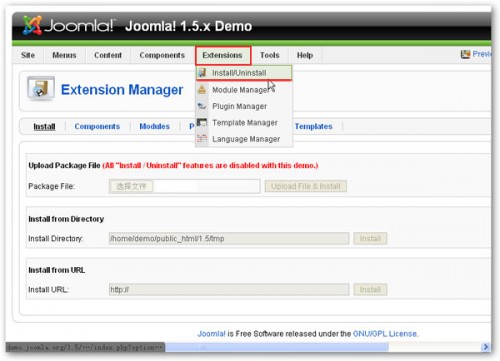
Have a look at how to add your own extensions to Joomla! below with just a click:
Note: Some features like Install/Uninstall are disabled with this demo, but surprisingly, you can have the easy access to download the complete version without any limitations. I’ll come to this part in the next step.
4. Download Joomla! and Start Your Adventure:
Download the Joomla! 1.5.x full package and set you free from limitations. Upload your own extensions, try diverse functions, and do whatever you want to customize the “masterpiece”!
5. Insert the Flash Video Player in Joomla!:
For amateur users, above-mentioned information may be the all they have to know, but for professionals, we’d like to dig it a little bit deeper. You may have discovered that there is no any web player module in the existing “Extensions” menu, fortunately, you can find few when you proceed to search in the Joomla! Extensions Directory. Unfortunately, the only few you can find are almost labeled ones, like YouTube and JW, etc. Here comes the question: What if I want to insert the flash video player with my own brand?
My answer is: absolutely no problem! Just follow the easy steps below:
Step 1: As we have made it clear in Point3, if you want to add some elements that Joomla! doesn’t have, they have to be added in the form of modules, and always bear in mind that they can only be installed in the COMPLETE version of Joomla! as well. Not the
TRIAL! Here you can download the flash video player module we specially designed for Joomla!.
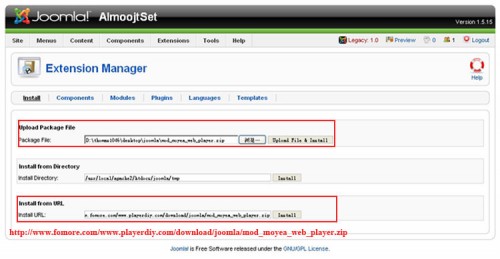
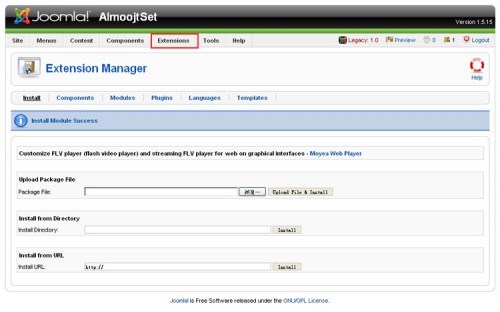
a. Click “Extensions” –> “Install/Uninstall” to enter the following installation interface. You can either upload the whole .zip file downloaded from above link or directly input the link URL to complete installing.
Good news: Moyea Web Player is just approved by Joomla! Extensions Team and has been listed in Joomla! Extensions Directory officially! Click here to visit the Moyea Web Player page in Joomla! Extensions Directory and download from there directly. It’s an honor for us and we’d like to share it with you!
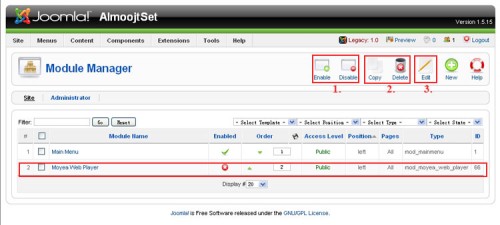
b1. After the successful module installation, the following page appears. Click “Extensions” –> “Module Manager” to proceed to the next step.
b2. Manage the added module here.
c. Click “Edit” icon indicated above to customize your own flash video player either inside the module or inside the Moyea Web Player.
Tips: a huge difference and actually an advantage between the module we offered and other modules is – we provide flexible and optional ways to build and customize web player in your own style!
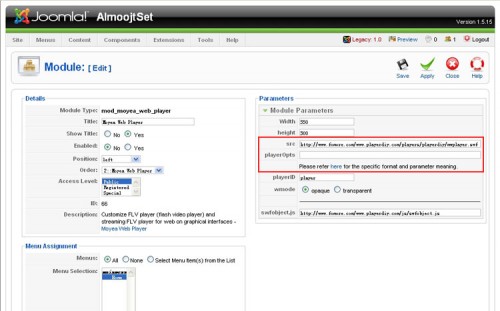
Option 1: You can build and customize the web player inside the module. This is the easiest way for amateur users. All you have to do is to fill the “playerOpts” field highlighted in red. There is a link under the box where you can click for more details about how to fill it. However, you may not have sufficient options to choose for web player’s style in this way.
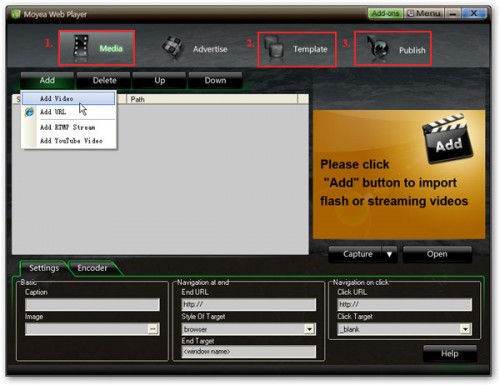
Option 2: You can build and customize the web player inside the Moyea Web Player. This program is the desktop end for creating and customizing your personalized web players in a “what you see is what you get” mode, and with many templates, styles, options, addons available to choose from. Please proceed to Step 2 and Step 3 below for the guide of how to use Moyea Web Player.
Step 2: Moyea Web Player is a very easy-to-use and powerful flash video player creating program which just takes few minutes and 3 steps to build and customize a perfect flash video player. The step-by-step tutorial is available here.
Step 3: Establish the connection between Moyea Web Player and Joomla!.After publishing the created flash video player, you only have to input the player’s URL into the “src” field of the module installed in Step 1. Click “Save” and then “Preview” to view the player effect on public frontend.
Reasons You Have to Know why Moyea Web Player is Recommended
a. It’s a real and powerful web player creator both for amateur and professional users;
b. It allows you to customize your-own-brand web player in a “what you see is what you get” mode, with many diverse styles to choose from but without any
requirement of coding knowledge;
c. The player creation and customization can be totally done inside the program instead in the module. This enables you to use the full functions in a
comfortable design environment other than to choose from the limited options the module has offered.
d. The easy connection between player and Joomla!. Remember the free module we have provided? It functions as a bridge connecting your web player and
Joomla!, just give it a player link, then it works perfectly. Amazingly simple.
6. Share Your Story with Joomla!:
Joomla! Community and Joomla! Forum are awaiting if you have anything to share and ask.
Cheers and happy using Joomla!.

